───✱*.。:。✱*.:。✧*.。✰*.:。✧*.。:。*.。✱ ───
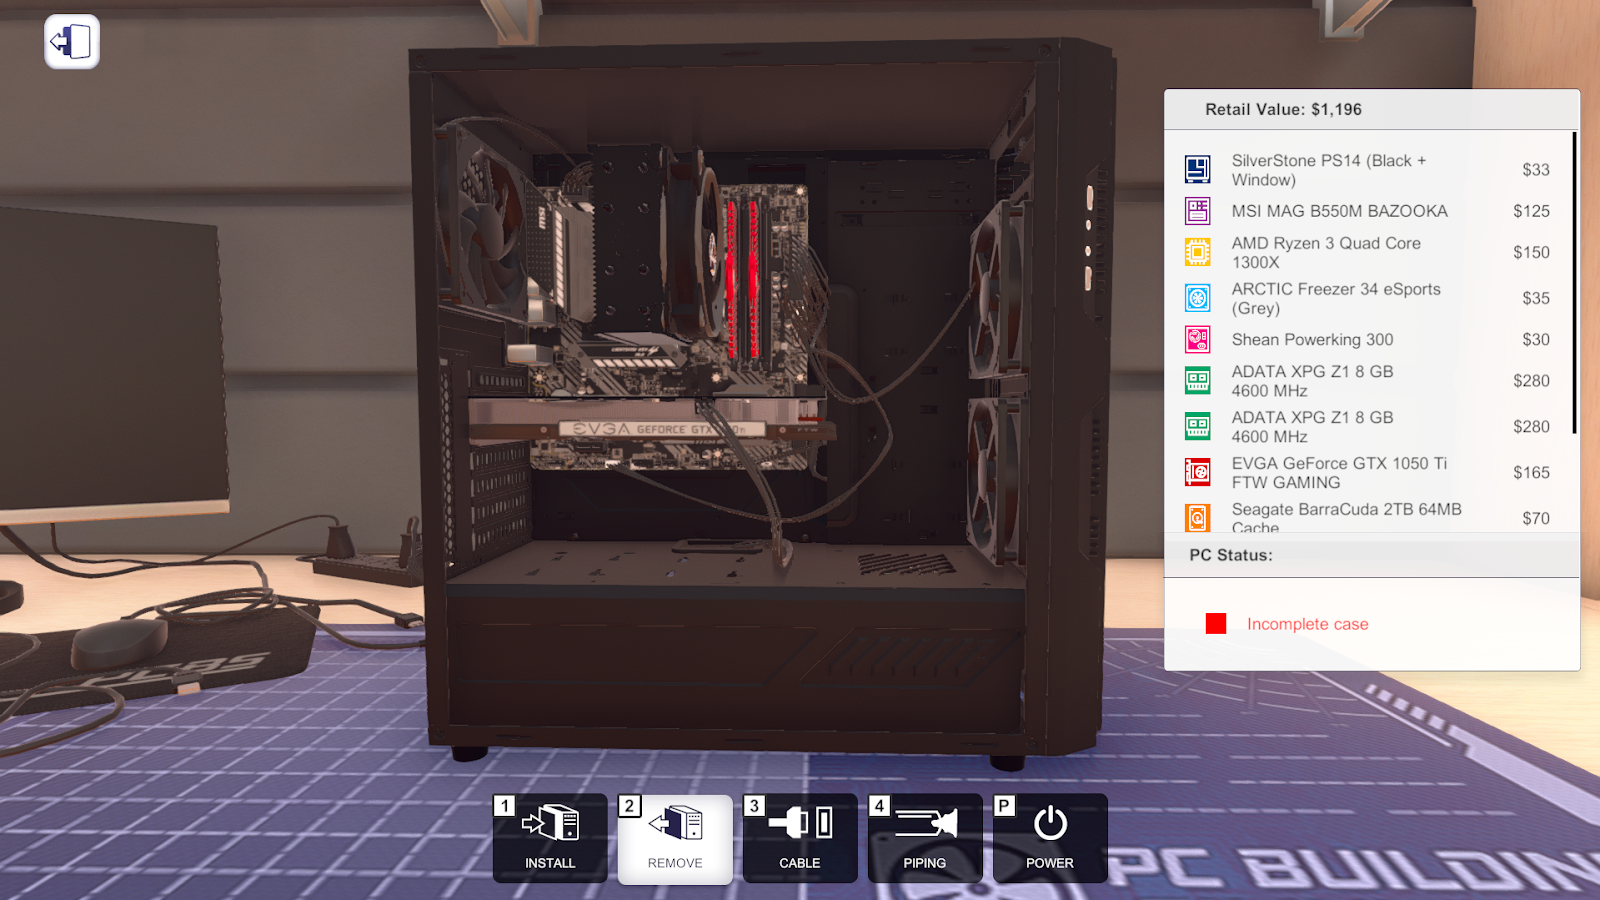
Speed Build - Memory Master
Screenshot(s)
Description
I was aiming for the highest capacity I was able to get with the budget; but the RAM was pretty expensive, with each stick being $280. I was able to get 16GB at a speed of 4600 MHz. Also, I’m pretty sure it’s not possible to get the latency from PC Building Simulator, but I did some research and the latency (or timings) are 19-23-23-46?
Also, I messed up a little—after enabling XMP in the BIOS settings, I realized that the motherboard only supports up to 4400 MHz. I probably could have spend less on other components to get a motherboard that supports 4600 MHz.
Parts
| Type | Name | Price |
|---|---|---|
| Case | SilverStone PS14 (Black + WIndow) | $33 |
| Case Fans | Mortoni Heat Away 120 x3 | $7 x3 |
| Motherboard | MSI MAG B550M BAZOOKA | $125 |
| CPU | AMD Ryzen 3 Quad Core 1300X | $150 |
| CPU Cooler | ARCTIC Freezer 34 eSports (Grey) | $35 |
| PSU | Shean Powerking 300 | $30 |
| RAM | ADATA XPG Z1 8GB @ 4600 MHz x2 | $280 x2 |
| GPU | EVGA GeForce GT 1050 Ti FTW GAMING | $165 |
| HDD | Seagate BarraCuda 2TB 64MB Cache | $70 |
| $1196 |
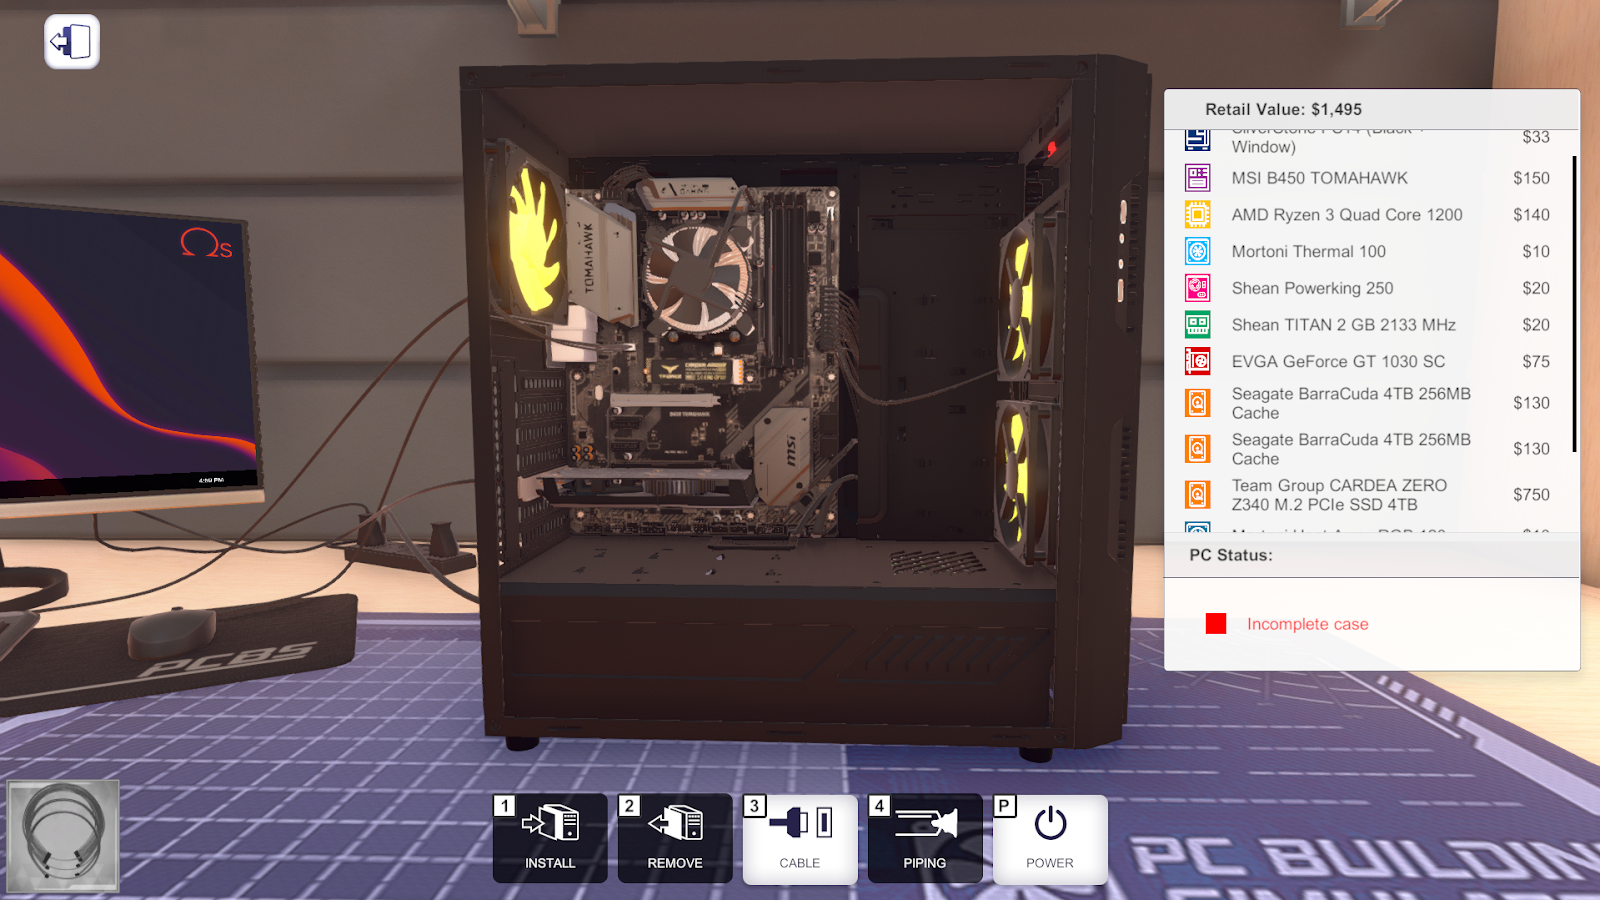
Storage Showdown
Screenshot(s)
Description
For this build, since it was focused on just the storage, I went with the cheapest option for every other part. For instance, I chose the cheapest motherboard with support for an M.2 SSD, the cheapest CPU for the socket type, etc. Also, since I had a few extra dollars, I put it towards RGB case fans since I couldn’t spend anymore money on storage.
By being cheap on every other component, I was able to fit the best storage possible (unless you had two M.2 slots, but they would be over budget anyways). The M.2 SSD had a capacity of 4TB at 3200 MB/s transfer speed, with the two 4TB HDDs having transfer speeds of 190 MB/s. PC Building Simulator doesn’t mention the HDD RPM, but I found it online on Amazon to be 5400 RPM.
Parts
| Type | Name | Price |
|---|---|---|
| Case | SilverStone PS14 (Black + WIndow) | $33 |
| Case Fan | Mortoni Heat Away RGB 120 x3 | $10 x3 |
| Motherboard | MSI B450 TOMAHAWK | $150 |
| CPU | AMD Ryzen 3 Quad Core 1200 | $140 |
| CPU Cooler | Mortini Thermal 100 | $10 |
| PSU | Shean Powerking 250 | $20 |
| RAM | Shean TITAN 2 GB @ 2133 MHz | $20 |
| GPU | EVGA GeForce GT 1030 SC | $75 |
| HDD | Seagate BarraCuda 4TB 256MB Cache x2 | $130 x2 |
| SSD | Team Group CARDEA ZERO Z340 M.2 PCIe SSD 4TB | $750 |
| $1495 |
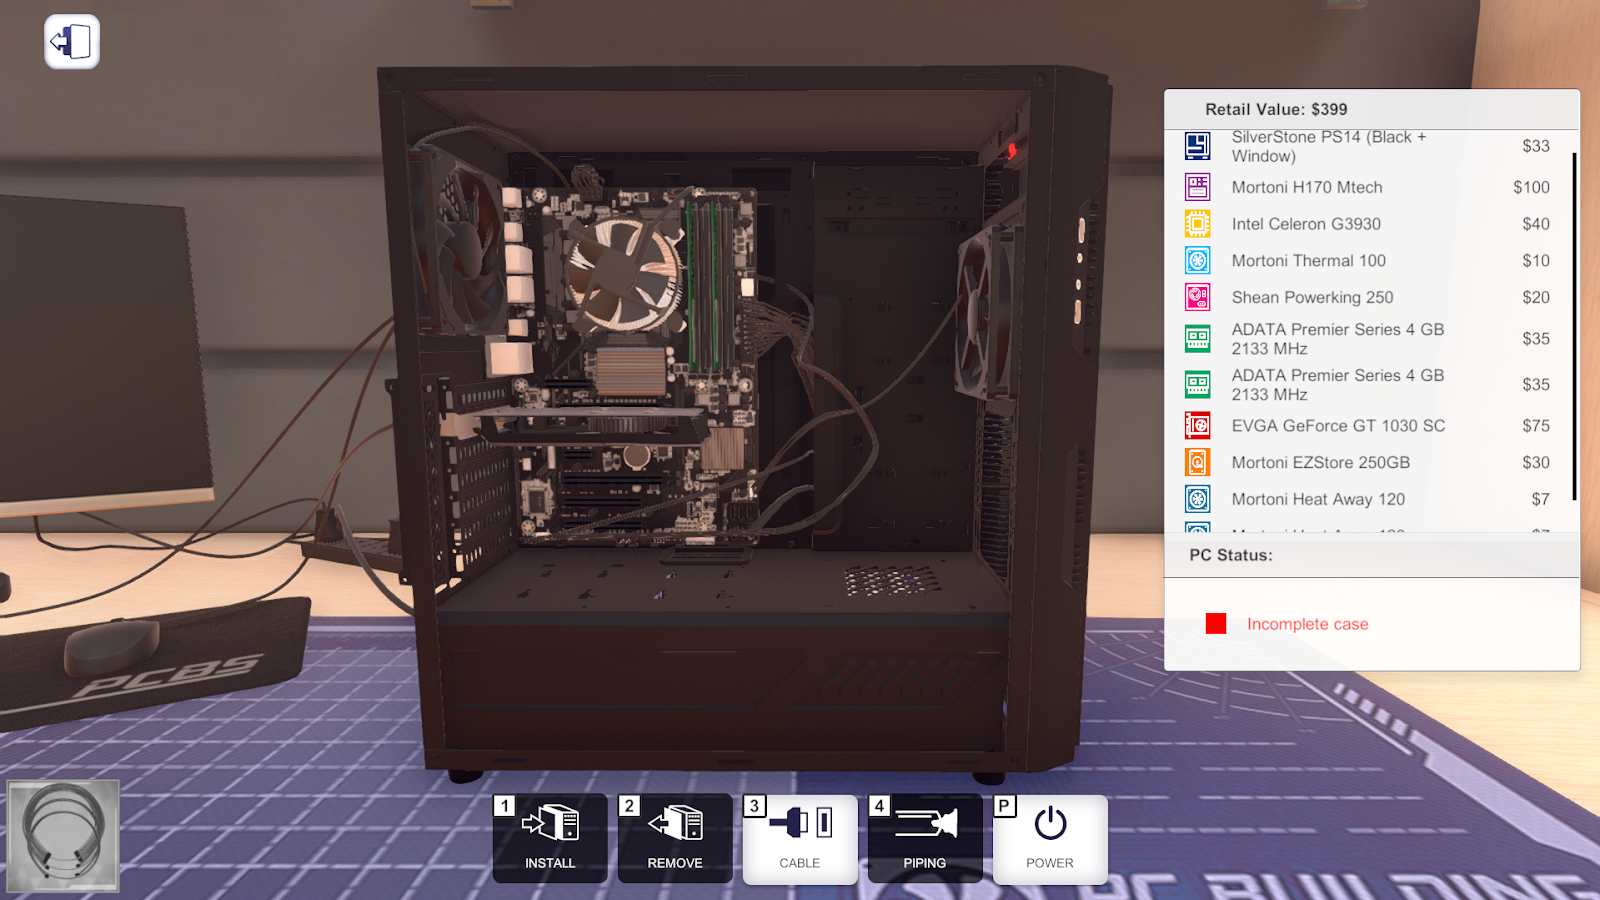
Upgrade Expertise
Screenshot(s)
Description
Since the majority of the old parts aren’t in PCBS, I just opted to work on the upgraded computer, rather than trying to get the parts before the upgrade. With a budget of only $400, it was really hard to find entirely new parts to upgrade the computer—so I had to make some sacrifices on performance.
For instance, the RAM is only running at a speed of 2133 MHz. Granted there are 8 GB of RAM, but it’s not going to be very quick at all. Also, the other components included in the build are quite literally the cheapest parts in the game. With the few extra dollars I had, I bought another case fan and upgraded the HDD from 120GB to 250GB.
Parts
| Type | Name | Price |
|---|---|---|
| Case | SilverStone PS14 (Black + WIndow) | $33 |
| Case Fans | Mortoni Heat Away 120 x2 | $7 x2 |
| Motherboard | Mortoni H170 MTech | $100 |
| CPU | Intel Celeron G3930 | $40 |
| CPU Cooler | Mortoni Thermal 100 | $10 |
| PSU | Shean Powerking 250 | $20 |
| RAM | ADATA Premier Series 4 GB @ 2133 MHz x2 | $35 x2 |
| GPU | EVGA GeForce GT 1030 SC | $75 |
| HDD | Mortoni EZStore 250GB | $30 |
| $399 |
Troubleshooting Triumph
Scenario 1: “The Sluggish Startup”
Description
The main problem with this system is that the main storage device is a HDD. Hard disk drives are significantly slower than SSDs, especially with boot times and loading applications. The rest of the system’s specifications are fine—such as the CPU and RAM, the slow read/write speeds of the hard drive are bottlenecking the system.
Diagnosis
The slow boot times and application loading are linked to the use of a HDD, which aren’t up to modern performance demands. The symptoms are typical of mechanical drives, which take a lot longer to access data compared to SSDs.
Solution
The ideal solution would be to add an SSD, ideally an M.2 SSD, for the operating system and applications that are used often. This will increase the boot times and overall system responsiveness greatly. The HDD can still be used, such as for mass storage or files that aren’t accessed often. After installing the SSD, the OS can be moved onto the new drive, and the HDD can be re-partitioned for general storage.
Scenario 2: “The Memory Muddle”
Description
The system is underperforming during memory-intensive tasks due to the RAM configuration. Since the system only has one stick of RAM, the system is running in single-channel mode, which can limit memory bandwidth. Additionally, the RAM is running slower than the CPU and motherboard can support, which makes performance even worse.
Diagnosis
The poor performance is caused by two issues—the RAM running in single-channel mode, and the RAM speed being lower than the CPU can handle. The Intel i7-9700K supports faster RAM speeds, up to 2933 MHz (or higher if you overclock), and dual-channel memory greatly increases performance in tasks like multitasking or gaming.
Solution
To resolve the issue, a second 16GB stick of RAM (with the same frequency) should be installed. This would both double the available memory bandwidth, and allow for dual-channel mode. Moreover, you could adjust the RAM speeds in the BIOS menu to run at a higher frequency or enabling XMP to increase performance.
Scenario 3: “The Disappearing Drive”
Description
The 2TB HDD not appealing in File Explorer despite being in BIOS is an indication that the drive is not properly initialized or configured with the OS. Additionally, the loose SATA power cable could be causing the drive to not be recognized.
Diagnosis
There are two issues with the system. First, the HDD not being initialized in Disk Management is the reason why it doesn’t appear in the operating system. Second, the loose SATA cable could be causing issues with the drive being detected.
Solution
To fix this, Disk Management (in Windows) could be used to check if the 2TB HDD is “Unallocated.” If so, the drive should be initialized and a new partition should be created to make it accessible. After, the SATA cable should be reconnected to prevent any other issues with the drive disconnecting.
Another solution (for a Linux system) would be to use something like fdisk. First, you would want to run lsblk or fdisk -l to see if the drive is recognized by the system. If the drive isn’t partitioned, you could use fdisk to initialize the drive, create a new partition, and format it to a filesystem like ext4 to make it accessible.
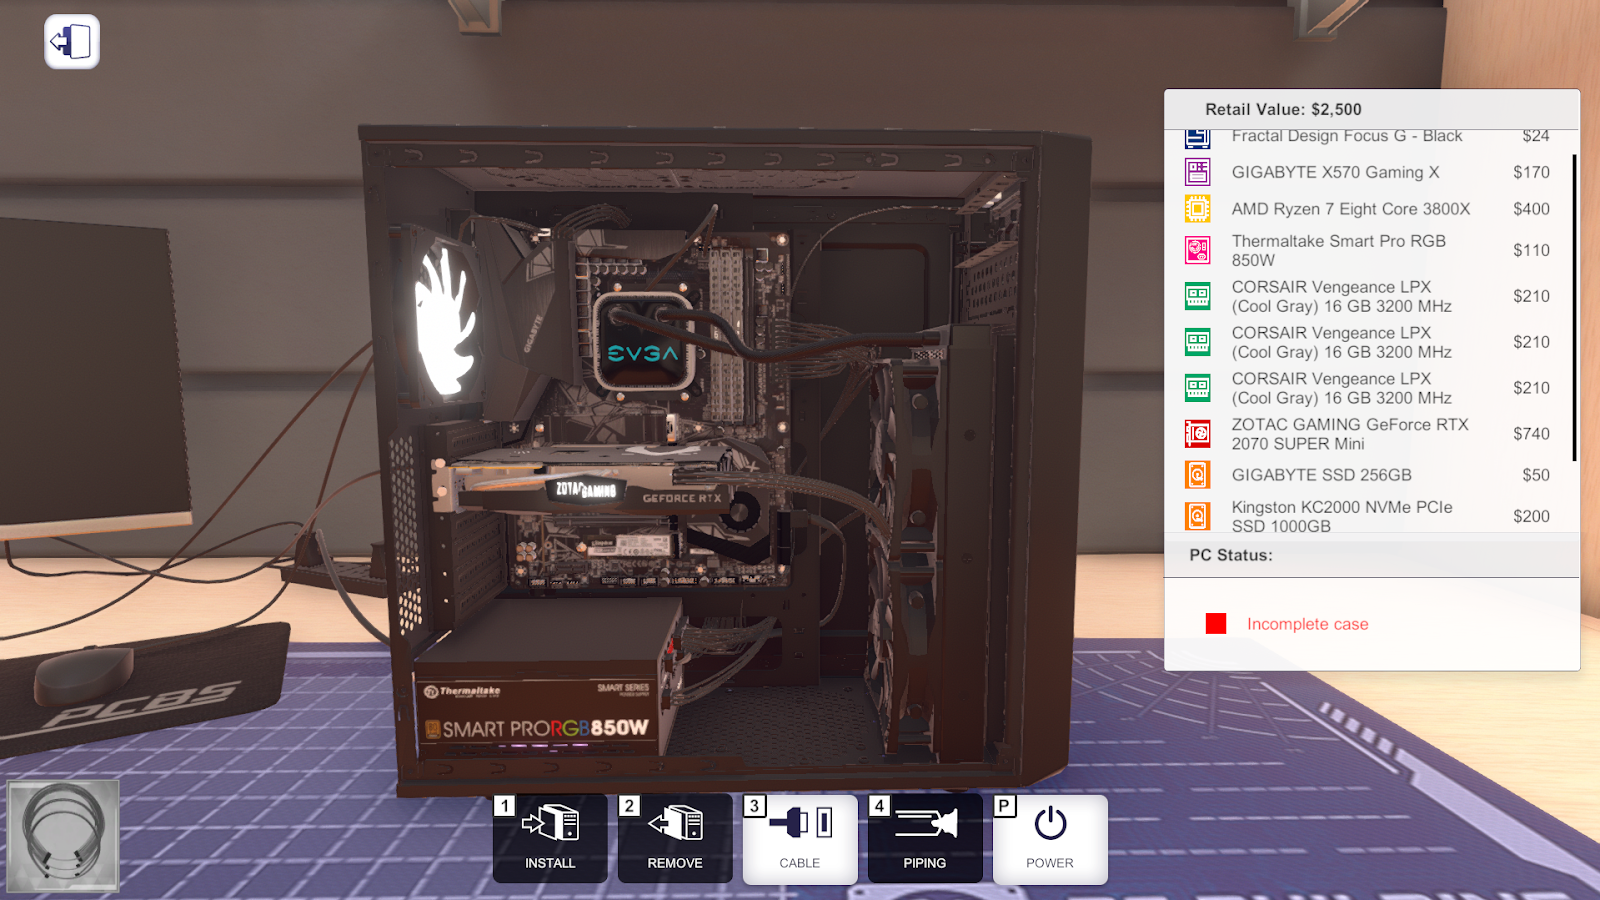
Future-Proof Build
Screenshot(s)
Description
No build in PC Building Simulator is going to really be “future-proof” in terms of RAM, especially. This is mainly because PCBS only goes up to DDR4, and DDR5 exists. However, for DDR4, this build has some pretty nice specs. For example, it has 24 GB of 3200 MHz ram. Although this is a non-binary ram layout, it should be completely fine for the majority of tasks you’d throw at it.
However, I was trying to make the build more well-rounded, so if you wanted to only focus on the RAM, you could probably downgrade something like the GPU, so you can have more RAM capacity. Since PCBS is only DDR4, there’s not really too much you can do to “future-proof” RAM other than having a good capacity at a good speed.
I think a few of the decisions I made could be different—such as a different power supply. I think the power supply being RGB is a little pointless, but I wasn’t exactly sure what to spend money on other than just a better graphics card, since the RAM sticks were $210 each, and I had like$100 extra. I also threw in an extra 256 GB SSD since I had ~$50 extra. As a result, I was also able to get the PC to be exactly the budget—pretty neat.
Parts
| Type | Name | Price |
|---|---|---|
| Case | Fractal Design Focus G - Black | $24 |
| Case Fan | Mortoni Heat Away RGB 120 | $10 |
| Motherboard | GIGABYTE X570 Gaming X | $170 |
| CPU | AMD Ryzen 7 Eight Core 3800X | $400 |
| CPU Cooler | EVGA CLC 280 | $140 |
| PSU | Thermaltake Smart PRo RGB 850W | $110 |
| RAM | CORSAIR Vengeance LPX (Cool Gray) 16GB @ 3200 MHz x3 | $210 x3 |
| GPU | ZOTAC GAMING GeForce RTX 2070 SUPER Mini | $740 |
| SSD | Kingston KC2000 NVMe PCIe SSD 1000GB | $200 |
| SSD | GIGABYTE SSD 256GB | $50 |
| $2500 |
Memory and Storage Research
Timeline of Developments
- 2004 → DDR2 RAM becomes widely available
- 2006 → SSDs become more affordable for consumers
- 2007 → DDR3 RAM standard introduced; increased speed and reducing power consumption
- 2010 → SATA III (6 Gbps) becomes the dominant interface for SSDs and hard drives
- 2012 → M.2 form factor and PCIe-based SSDs introduced; faster speeds than SATA
- 2014 → DDR4 RAM released with lower voltage and higher speeds
- 2016 → NVMe protocol revolutionizes SSDs, making them exponentially faster than SATA
- 2018 → Intel introduces Optane memory—bridging the gap between DRAM and SSD
- 2020 → DDR5 RAM introduced; higher bandwidth and efficiency
- 2022 → PCIe 5.0 SSDs announced, nearly doubling data transfer rates
- 2024 → CXL memory begins to be adopted in enterprise environments
Recent Breakthrough
One of the most recent breakthroughs in storage technology is PCIe 5.0 in 2022. This generation doubles the data transfer rates of SSDs compared to PCIe 4.0, with speeds up to 14 GB/s. PCIe 5.0 also allows for higher bandwidth, lower latency, and better power efficiency. This is ideal for intensive computing tasks, such as gaming or data-related applications. (xda-developers.com)
Future Trend Prediction
A future trend in memory technology is universal memory, mainly with the adoption of CXL (Compute Express Link). CXL allows for memory to be shared between CPUs and GPUs by creating a unified memory architecture. This could lead to the development of systems where memory isn’t tied to a specific CPU, which would make systems more scalable and efficient. This is particularly helpful for AI workloads, since it eliminates memory bottlenecks and improves bandwidth between different computing units. For PC builders, it could mean more modular RAM solutions, where the amount of DIMM slots on a motherboard isn’t an issue. (livescience.com, keysight.com)
───✱*.。:。✱*.:。✧*.。✰*.:。✧*.。:。*.。✱ ───